
Ring trees (RTs) are Ringba's implementation of the industry's common ping-post call buying scheme: a request is made to one or several dynamic call buyers to obtain potential targets for an inbound call. If you add multiple ring tree targets (RTTs) to a single ring tree, the system pings all the RTTs at the same time to retrieve information and evaluate it against criteria you set up.
Ring trees are available to admin users. Ring trees are available in the following Ringba subscription plans: Professional and Enterprise.
This article contains the following sections:
- Ring Trees
- Manage Ring Trees Screen
- How to Include a Ring Tree in a Campaign
- How to Export a Spreadsheet of Ring Trees
- Ring Tree FAQ
Ring Trees
Ring trees let you ping a number of targets simultaneously for bids so you can choose the best one to receive the call. The ring tree features provide you several selection criteria to filter targets based on their bid amount and their call requirements, like duration or acceptance criteria. You can use these tools to maximize the revenue from an incoming call.
Tip: Setting up an RTT involves integration with your buyer’s API. Many users prefer to get help setting up their ring trees and RTTs. See How do I get help with Ringba? for instructions on how to engage Support help with your RTTs.
Setting up a strike price schedule for your campaign affects how the ring tree works. When you set up a strike price schedule, you can set a threshold price for each hour of the week. If a bid comes in at or above that threshold, the auction ends immediately and Ringba chooses the winner. See Strike Price for more information.
Manage Ring Trees Screen
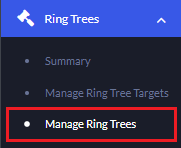
You navigate to the Manage Ring Trees screen by clicking Ring Trees > Manage Ring Trees. You can use the search bar at the top of the screen to search for ring trees by name or ID.
A table appears with a row for each ring tree already in your account. You can export a CSV of your ring trees. The columns in the CVS are similar to the columns listed below. See How to Export a Spreadsheet of Ring Trees later in this article for step-by-step instructions.
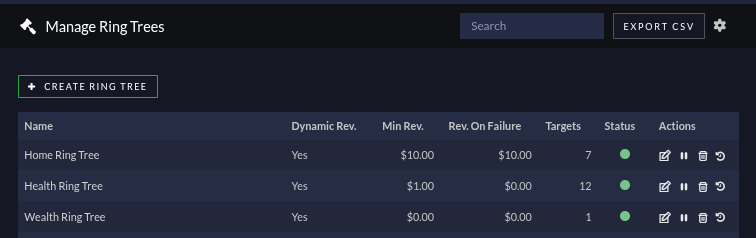
This table can contain the following columns:
- Name: The name of the ring tree.
- Dynamic Rev: Indicates whether you chose Dynamic in the Revenue Type field when you set up the ring tree.
- Min Rev: The amount you entered in the Minimum Revenue Amount when you set up the ring tree.
- Rev. On Failure: The amount you entered in the Failure Revenue Amount field when you set up the ring tree.
- Targets: The number of ring tree targets you added to this ring tree.
- Status: Indicates whether the ring tree is active or disabled.
- Actions: Contains icons you can use to act on the ring tree. See the following section.
You can click the column headers to sort the table by the values in that column. Click again to reverse the sort and click a third time to remove the sort.
Available Actions
The Actions column contains icons you can use to manage ring trees.

Click the icons in the Actions column to perform the following actions:
-
Edit: Click to open the ring tree so you can manage the details.
Tip: You can also click the ring tree name to open it. - Disable Tree: Click to temporarily stop calls from going to this ring tree. If the ring tree is already disabled, this becomes an Enable Tree button.
- Delete Ring Tree: Click to delete this ring tree. If you click this icon, a confirmation window appears showing the list of campaigns, ring tree targets, and routing plans associated with this ring tree for you to review before you delete.
- View Activities: Click to see a history of activity for this tree, including the timestamp and the user.
How to Set Up a Ring Tree
Use the following steps to set up a Ring Tree:
Note: Call providers often require a particular configuration. The following example is just one possible setup. Almost every dynamic buyer will have its own unique requirements; however, you can use the following example to get an idea of how to implement a ring tree.
-
Click Ring Trees from the left navigation panel and then click Manage Ring Trees.
- Click the Create Ring Tree button to display a form.
- Complete the fields on this screen. The rest of this procedure describes each section of fields. You can also use the tool tips in the application to learn about each field.
-
Click the Create Ring Tree button.
Please note: For a ring tree to operate correctly, it must contain at least one ring tree target.
General Information Section
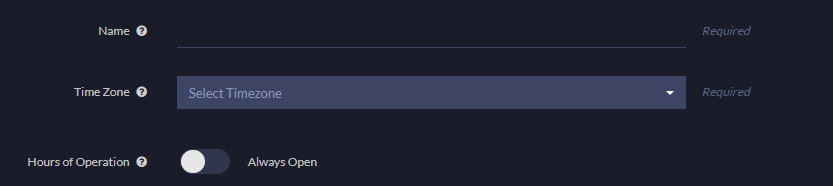
The first section of fields is where you specify general information about the ring tree. You must enter the RT’s name, time zone, and hours of operation.
The Hours of Operation switch is set to Always Open by default, but if you toggle it, tools appear for setting specific hours. In the Basic mode, you can choose an open and close time that applies for all days of the week. In the Advanced mode, you can choose different open and close times by day, add breaks, and even turn entire days off.
Revenue Settings Section
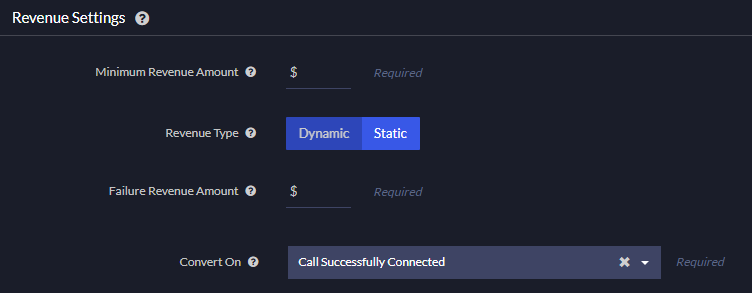
Use the fields in this section to set the default revenue settings for all the ring tree targets in this ring tree. These fields specify when and how much you are paid for the call.
- If you choose a Static revenue type, a new field appears where you enter the Static Revenue Amount.
- If you choose Call Length in the Convert On field, fields appear for you to configure when to start counting the call length, whether to use a Static or Dynamic call length value, and what call length you require.
These settings will apply unless you override them on a particular Ring Tree Target.
Error Settings Section
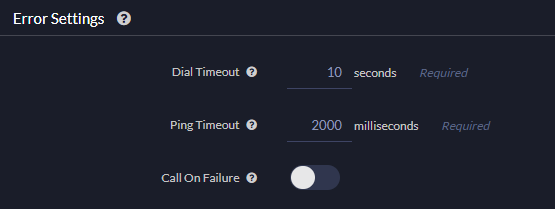
Use the fields in this section to specify default settings for how long to wait before considering a dial or a ping to be timed out. You also choose whether to send a call even if the ping fails.
Tip: We recommend setting Dial Timeout to 10 seconds and Ping Timeout to 2000 milliseconds, as you see on the fields.
These settings apply unless you override them on a particular ring tree target.
Add Ring Tree Targets Section
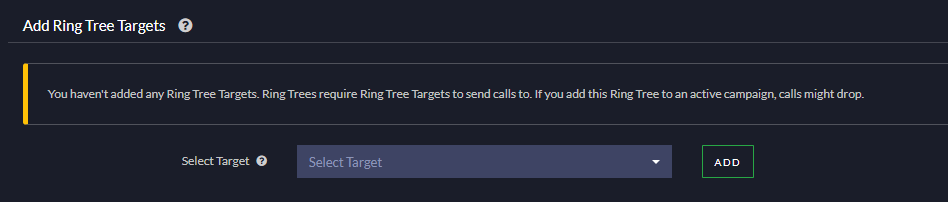
Use this section to add ring tree targets to your ring tree. Your ring tree must have at least one ring tree target to work.
How to Include a Ring Tree in a Campaign
Once you have defined the ring tree, you can include it in a campaign. To do this, you must create a routing plan that includes a ring tree.
Tip: Make sure to select the Trees tab to find your ring tree on your routing plan.
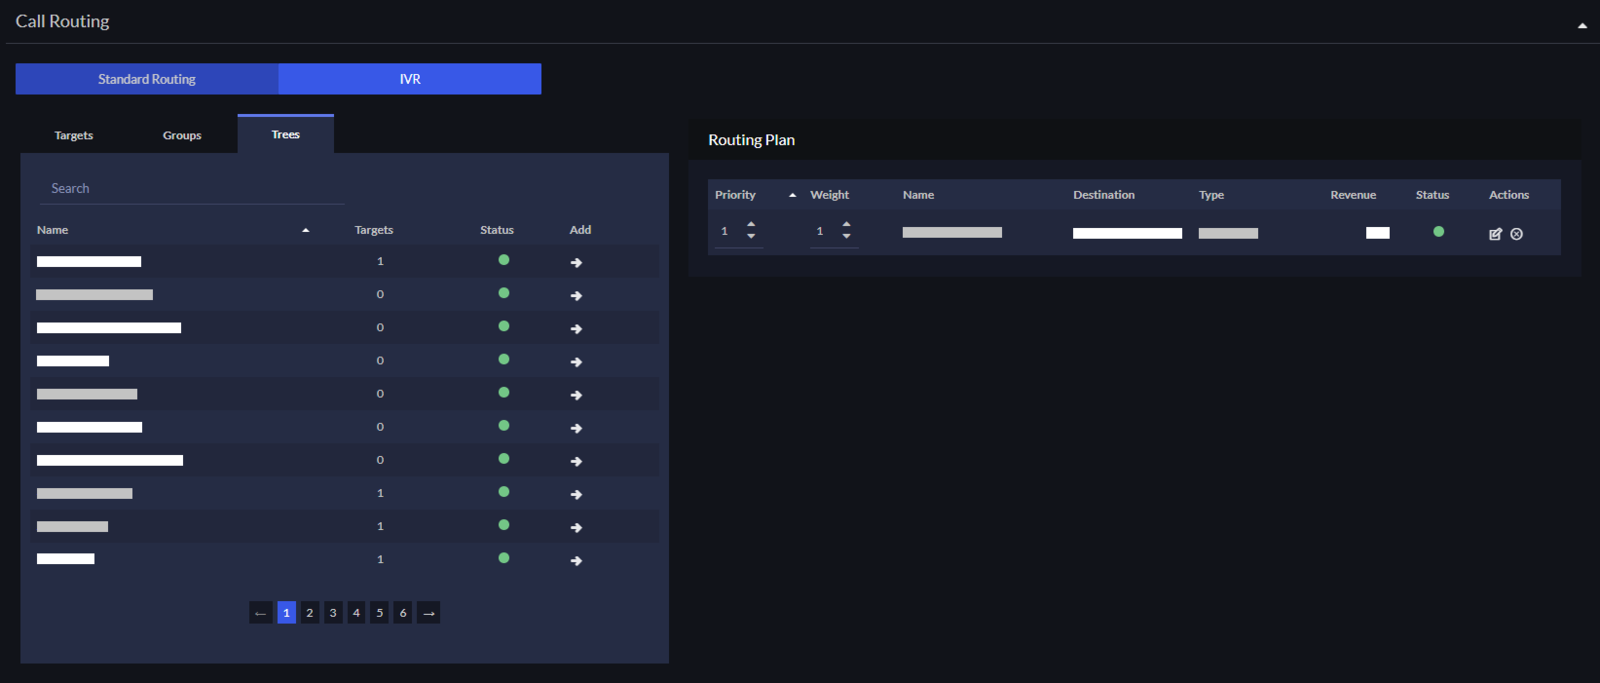
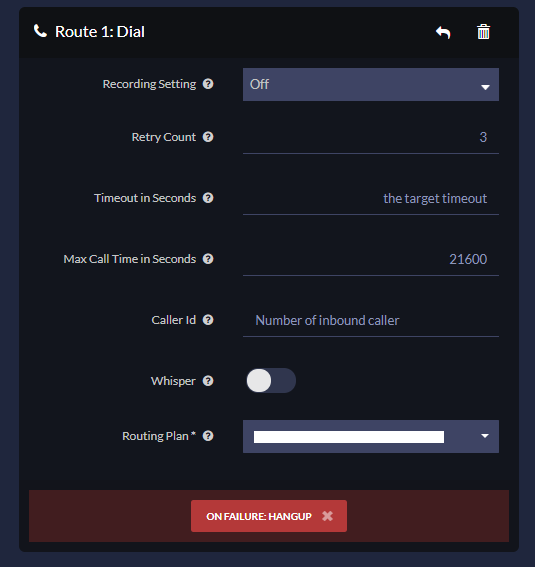
If you are using an IVR, you must include the routing plan containing the ring tree in your IVR.
Note: For security reasons, some buyers ask which IP Ringba's Ring Tree request comes from. If they ask you which IP they should whitelist, you can refer them to this article: Pixels, Ring trees and Custom Scoring IP whitelist.
How to Export a Spreadsheet of Ring Trees
You can export a CSV file that contains all the ring trees in your account. The CSV contains the same data you see on the Manage Ring Trees screen.
To export a spreadsheet of ring tree targets:
- Navigate to Ring Trees > Manage Ring Trees.
- Click the Export CSV button in the upper-right corner.
A CSV file is downloaded to your browser's downloads folder. The CSV contains a row for each ring tree. The first column is the ID, which contains the ring tree's unique identifier in Ringba. The rest of the columns are similar to those on the Manage Ring Trees screen. See the Manage Ring Trees Screen section earlier in this article for column descriptions.
Ring Tree FAQ
Can I add the same ring tree target to multiple ring trees?
Yes. If you add a ring tree target to a subsequent ring tree, Ringba duplicates the ring tree target. A message appears when you add the RTT to let you know it will be duplicated.
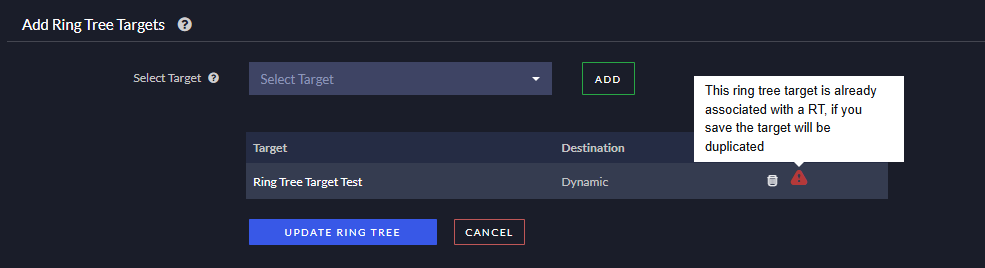
Ringba creates a second RTT with settings that match the original RTT exactly.
Note: Once you duplicate a ring tree target, the two copies are not connected. If you need to make a change to the configuration, you must make it in both places.
What should I do if I need help with my campaigns?
If you have any questions or need additional help, please reach out to our support team via chat or email at support@ringba.com.